Blog
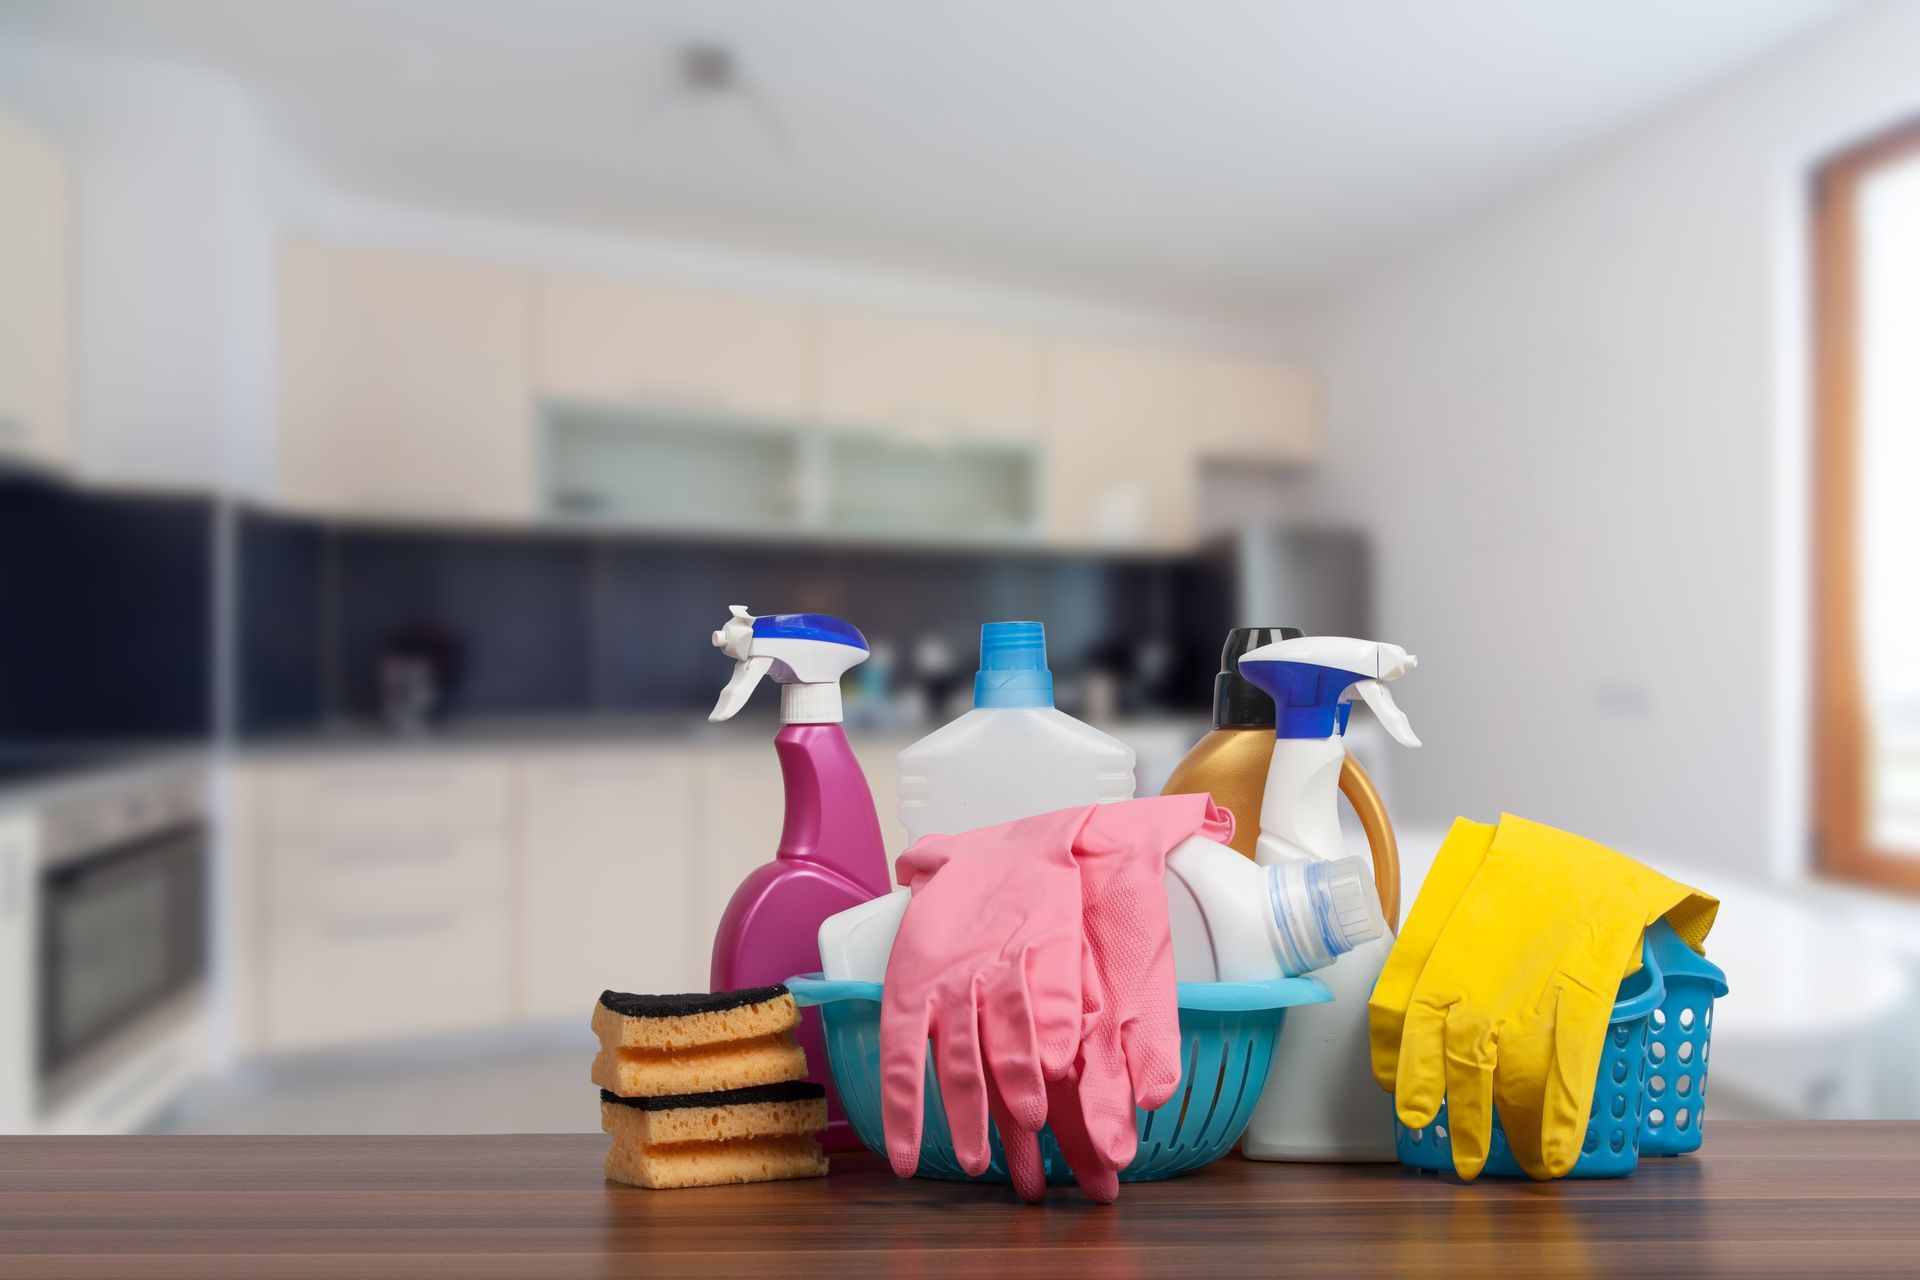
Life is anything but immaculate; it’s a seemingly perpetual battle of time, professionally, personally, and socially. Careers have taken a pivotal toll on the number of hours you have left for self-care, family, and other responsibilities that demand your attention, including cleaning and other household functions. Although some ventures can be shelved as they may lack urgency, others cannot. More definitively, putting off your house cleaning may deem to be an inoffensive compromise, but if left to amass, it could prove to be adverse. This creates an even more challenging feat than if braved systematically, one project at a time. The key to any well-maintained home is a plan of action and a commitment to follow through. More often than not, your system will require some tweaking, with elements of trial and error to ascertain what not only benefits you, but is expedient as well. If your master proposal is not conducive to your schedule and your overall lifestyle, then the endeavor to a certain extent will backfire. Our team at Sunrise-Cleaning has ten vital suggestions that could benefit the masses, and ultimately be tailored to fit your life’s exclusive paradigm.
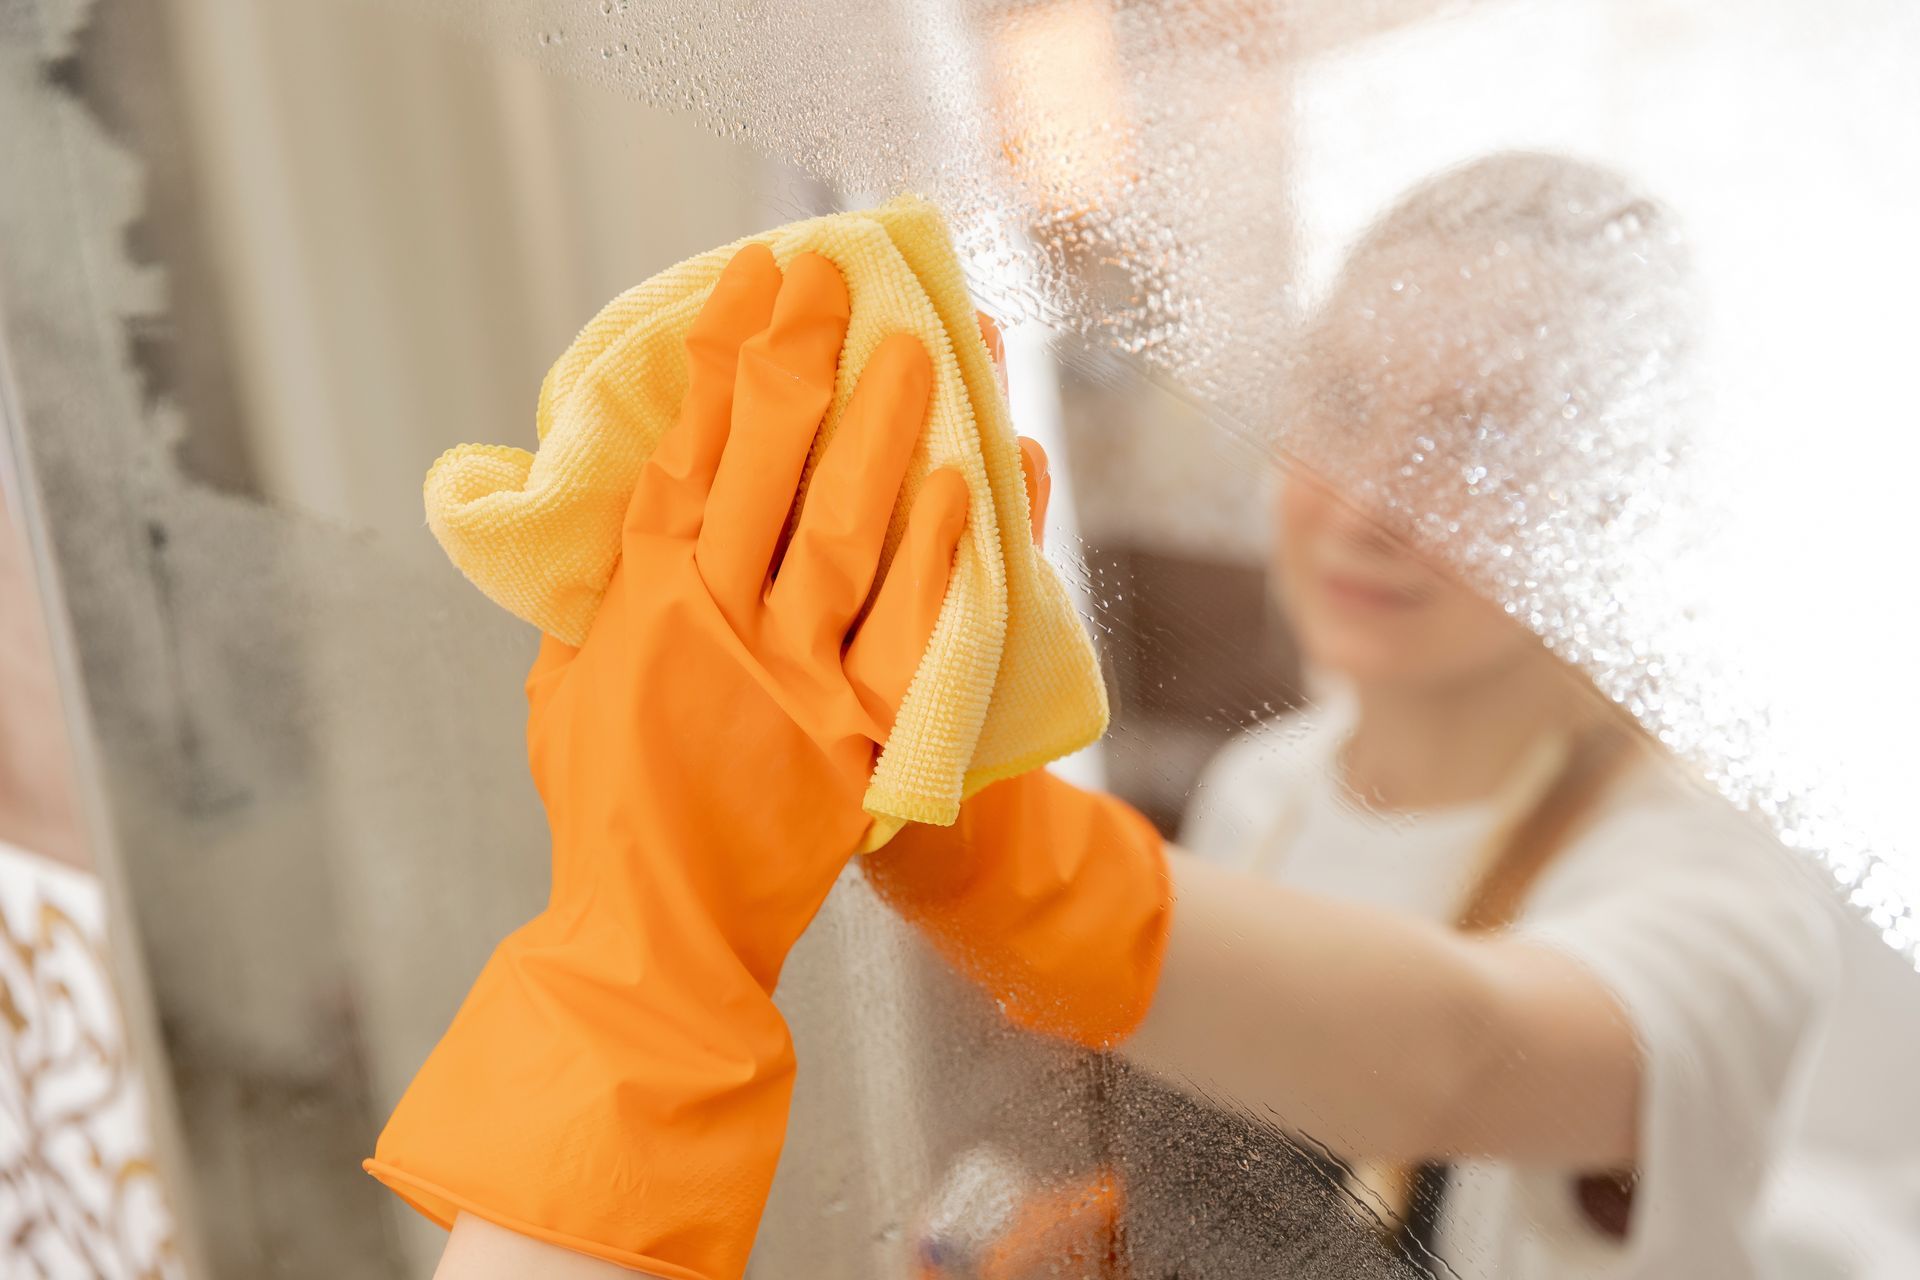
Have you noticed that your mirrors are often one of the first things to get dirty in your home? These beautiful items always seem to end up with streaks, dust, or fingerprints. How often have you stopped to check your reflection, only to be distracted by some marks on the mirror? There is nothing like a dirty mirror that can ruin the look of your home. It can make your bathroom look messy, and your home appear unkempt. Having a clean mirror is one of those little details that can add so much to your home. When you have a shiny and streak-free mirror, it can reflect the light around your home better, making everything seem brighter and bigger. It’s amazing to see the difference that a clean mirror can bring to your space. Unfortunately, it’s not always easy to know how to best clean a mirror. Without a good technique, you could be left with a mucky, streaky mess on your mirrors. When it comes to getting your mirrors clean, there are several things you should not do, including: Wiping steamy mirrors with a towel after a shower: Some people think that this is a good way to clean off all the dust and buildup, but it will only leave your mirror looking worse for wear. This is because towels often end up leaving dust behind. Without a proper glass cleaner, your mirror can also get streaks from this approach. Using a newspaper to clean your mirror: Although it was once a reliable way to get a good look from your mirror, the ink from modern-day papers can leave residue behind. This can leave a streaky mess on your mirror. Wiping your mirrors with a paper towel: Unfortunately, paper towels can leave behind little pieces of dust. Rather, you need a good cloth that is lint-free. Using chemicals that aren’t specifically made for window or glass cleaning: If you find that your mirrors and glass have a hazy look to them, then you know you are not using the right cleaner for the job. Anything that has been marked as a glass cleaner has special chemicals that won’t leave streaks behind. While avoiding these practices can help, there are some more steps you can take to deep clean your mirrors properly. Tips to Get a Streak-Free Mirror One of the most important aspects of cleaning your mirror is the tools that you use. That doesn’t mean you have to spend a lot of money on new cleaning products and equipment. Some of these items may already be lying around your home. Equip yourself with: Microfibre cloths: It’s best to use flatter ones, as the thicker ones can collect lint and leave it behind, basically ruining your clean mirror look Cleaning solution, such as a glass cleaner or a simple water-vinegar mix Cotton pad Rubbing alcohol Now that you have the right tools, it’s time to get the right technique. There are many techniques and approaches that people say will work, but in reality, they don’t. Here is a five-step process that you can rely on: Tackle the messiest part of the mirror first. That means dried-on toothpaste, hair products, etc. The best approach to get rid of this grime is to pour the rubbing alcohol on the cotton pad and start wiping. You may need to use a lot of elbow grease to get the buildup off, but try not to scratch the mirror in the process. It’s important to work fast because rubbing alcohol can dry quickly. Consider this the pre-wash phase, similar to treating the stains on your fabrics before you throw them in the washing machine. Next, use your cleaning solution by spraying it on the mirror. The trick is not to overdo it — just a little mist will get the job done. If you put too much on the mirror, it will start to drip, which will make even more of a mess for you to clean up. Once you have a mist sprayed on the mirror, take a microfibre cloth and fold it two times. This gives you a few layers to use during the cleaning process. Starting at the top, left-hand side of your mirror, and wipe the cloth to the right. Then, without lifting your cloth, wipe back to the left but use a downward angle. Continue using this wiping pattern until you reach the bottom of the mirror. It should be a zig zag or Z-type pattern, so it’s easy to follow. Remember that if your cloth collects too much dust or solution, you can fold it again and use a drier and cleaner corner of the microfibre cloth. Finally, look at your mirror from different angles to see if you can spot any stains or streaks. You can buff these out by using a clean side of your microfibre cloth and a little cleaning solution. However, in this step, don’t re-apply the solution to the mirror. Instead, spray it on your cloth and then gently wipe the streak until it’s gone. This technique can be used for any of the mirrors or glass in your home. It should help you enjoy a streak-free clean for a long time. Conclusion If you find that your mirrors are one of the first things that get dirty in your home, or if they always seem to have streaks, dust, or fingerprints on them, there is a proper way to clean them and get your mirrors sparkling. Mirrors are one of those understated decorative items in your home that have a lot more impact than most people realize. If your mirrors are dirty, they can give guests the impression of a messy home. However, when they are cleaned properly, mirrors can add light and depth to your space. It can be amazing to see how much of a difference a clean mirror can make. For more information about the best cleaning practices , call Sunrise Cleaning at 289-814-1824 or contact us here .
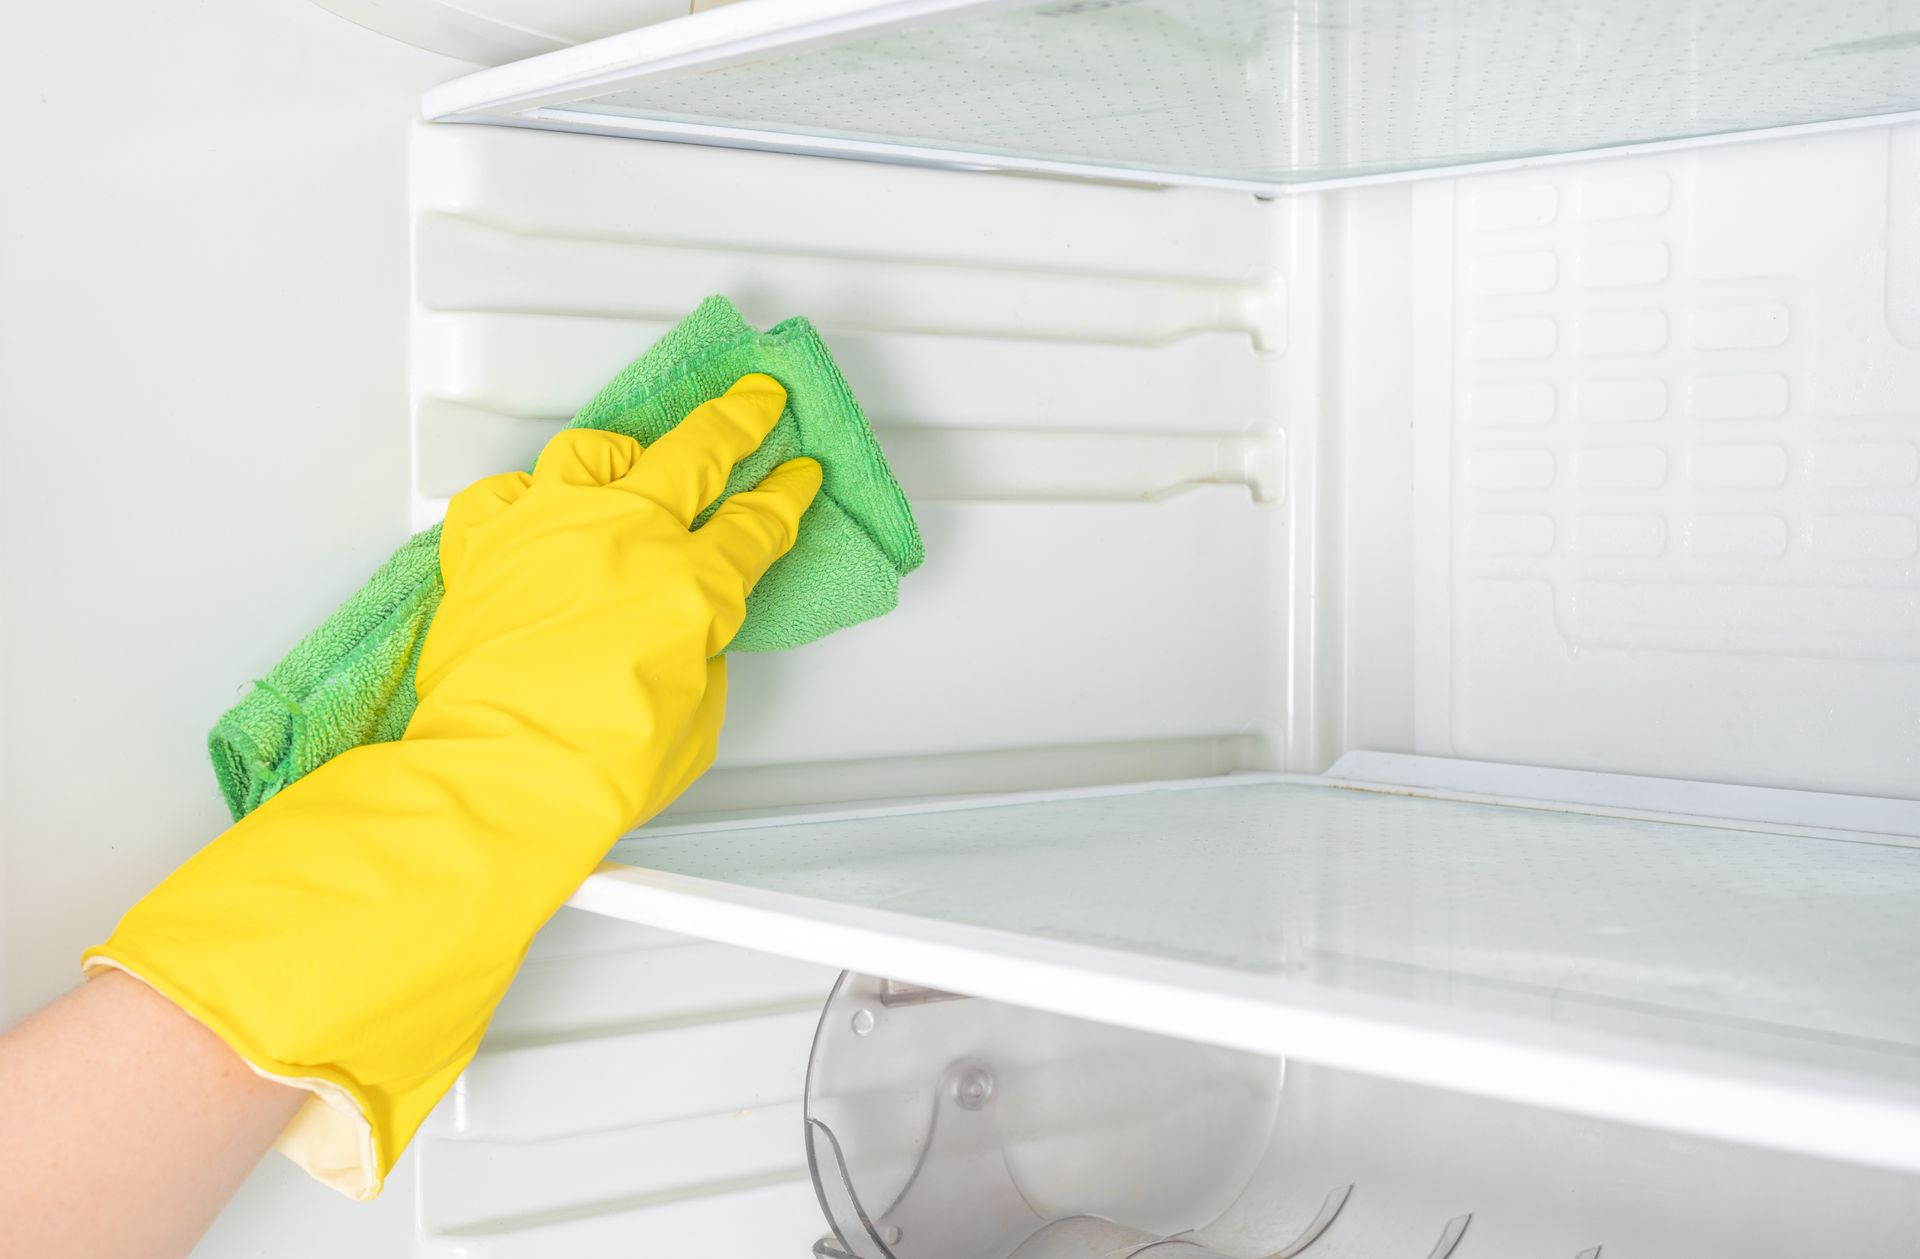
Cleaning your freezer is not simply about removing food and allowing it to defrost. There are actually many steps to getting it done right! To ensure its optimal performance over time, here are 8 tips for cleaning your freezer: Unplug the freezer The first thing to do when cleaning your freezer is to turn it off. This will prevent the risk of electrical shock and other injuries as your freezer defrosts. Since turning off your freezer will cause it to defrost, make sure you place it in an area where extra water will not damage the floor or other appliances. If necessary, place towels or old newspapers underneath it to soak up water. Remove all the food After you turn off your freezer, remove all the food from inside to prepare for the big wash-down. Place all food items in the fridge or another freezer to keep them cool while you clean. Place frozen food into plastic storage totes or large containers with lids. By storing food in sealed containers, you can prevent premature defrosting. Line containers with towels or plastic bags to make cleaning easier when the food goes back into the freezer. Take inventory of everything you have The chances are that a lot of the food inside your freezer has been there for a long time. Cleaning your freezer is a great opportunity to take inventory of everything you have. As you remove the items, write down the names and expiry dates of everything you intend to keep and ensure that the containers are labelled. Also, inspect and smell food to determine if it’s spoiled or not. Indicators of spoiled food include: Abnormal discolouration Foul smells Frost or ice on the food inside the container or packaging Out of date labels Speed up the defrosting process Once these first few steps are done, it’s time to let your freezer defrost. This could take many hours if you only leave the lid open. However, if you’d like to speed up the process, here’s how: Place a large container of hot water in the freezer and close the lid. You may need to replace the hot water several times. Use a hairdryer on low heat. Keep the water away from the dryer, as it could cause an electrical shock. Cleaning Once your freezer has defrosted, drain it. Then, use a mild cleanser like dish soap or baking soda and vinegar to clean it out. Here’s how you should clean it: Place a small amount of your cleaner of choice in a bowl and add water to it Dip a cloth in the solution and wash the interior Remove any shelves or baskets and wash them in your sink Rinse your freezer to remove any cleaner Allow it to air dry To get rid of any lingering unwanted smells, place a box of baking soda inside and close it for several hours. You can also keep a box of baking soda inside the freezer with your food as a preventative measure, as long as you replace it every few months. Clean the drip pan and dust the coils After your freezer is dry, clean the drip pan and dust the coils. Locate the drip pan under the freezer. Mop up any water, then pull it out and wash the pan with warm, soapy water and allow to air dry. If your drip pan is fixed in place, use a damp cloth to clean it. To keep your freezer running efficiently, you need to dust the coils. You can easily do this with a vacuum cleaner or a coil brush—just make sure you keep your freezer unplugged! Clean the exterior of your freezer One of the last steps is to clean the outside with soap and water. Pay special attention to the areas around the handles. For stainless steel exteriors, use commercial stainless steel spray. Replace and reorganize Now that you have finished cleaning your freezer, it’s time to place your frozen items back inside. To prevent items from being forgotten, organize your food as you put it back inside. Place foods with a long freezer life near the bottom and food that should be used fairly soon near the top. Take your inventory and attach it to the top of your freezer. Keep track of your food as you add or remove items. At Sunrise-Cleaning , our team of trained cleaning professionals offers quality maid services to residential and commercial properties throughout Oakville and Mississauga. Whether you need a regular recurring cleaning on a weekly, bi-weekly, monthly basis, or simply need an occasional basic cleaning or deep clean once per year, our maids are here to help. We can also provide last-minute same-day cleaning service (subject to availability). For your convenience, we offer a full range of house cleaning services . Please follow this link for detailed information regarding each package. To request a detailed estimate customized to fit your needs, check out our Request an Estimate page or call us at 905-567-1199 —we will be happy to help!

In any workspace, productivity is essential. Without hard work and consistency, your business is likely to falter. Good work ethics, efficiency, and high productivity are just some of the things that contribute to business growth and success. When these aspects, along with other things, do not exist, your business will likely suffer. However, when issues such as low productivity arise, it is generally an in-house issue. Factors such as inadequate equipment, employee dissatisfaction, or an overall unhealthy or unclean work environment are just some of the things that can harm productivity. In an effort to overturn the off-putting effects that stem from poor productivity, here are some suggestions. It’s important to remember that a clean, safe, and adequately organized environment contributes significantly to greater productivity. Below, we have some professional tips on how you can keep your workspace and office furniture clean. Dusting Various elements create dust. In an office with multiple people working together, the sources of dust production increases. Paper fibres, upholstery fibres, skin and hair cells, improper air filters, and many other factors can encourage the collection of dust. In high traffic areas such as offices, dusting all surfaces and areas is crucial. Dust tends to settle on almost everything. So, everything should be dusted. Particularly, though, cleaning these areas and surfaces are pivotal in minimizing the collection of dust: Desks Objects on the desk such as picture frames, globes, etc. Bookshelves Filing cabinets Window sills Computer monitors Computer mouse Telephones When dusting these items, avoid using a feather duster as this can disturb the dust. Instead, consider using a damp cloth or suitable furniture polish or cleaner to eliminate these dust particles. This will help to prevent the dust particles from becoming airborne, which can settle elsewhere or worsen allergies and other health issues workers may possess. Disinfecting Frequented Surfaces Despite what you may think, your office furniture is probably housing more germs and bacteria than the office bathroom. When you go about your day working, touching your mouse, telephone, monitor, or co-workers’ keyboards or desks, cross-contamination is sure to occur. For this reason, disinfecting surfaces is imperative. When sanitizing your space, be sure to use disinfecting wipes to destroy unwanted germs and bacteria. Be sure to wipe down your desk, chair handles, telephone, door handles, computer, computer mouse, and other items that are touched regularly. Doing so will help to ensure that your work environment remains hygienic and sanitary for daily use. However, when cleaning electronics, be sure to use wipes that are safe for these surfaces. Removing Unwanted Fabric Spots In a high-traffic space such as an office, it’s quite likely that stains and unwanted spots will appear on the carpet, entrance rug, or upholstery. Coffee spills, mud spots, and food stains are just some of the soiled spots that can make an appearance. Leaving these stains as is can make your office appear dirty and unwelcoming. Cleaning them can help to enhance its look and make it clean and fresh. Consider using carpet cleaner spray to remove spots in rugs and carpets. For upholstered chairs in your office, this spray can also be used to lift stains. If using this spray does not suffice, you can make your own stain remover. Baking soda along with warm water on unwanted spots is also an excellent solution for lifting stains. However, be prepared to allow it to sit for a couple of hours before removing it. Vacuuming, Sweeping, and Mopping Floors Cleaning the floors in your office is one the most crucial requirements for keeping it clean and reducing the risk of any potential dangers. If debris or spills accumulate on the floor, it can create a plethora of issues. It can make your office space unsanitary and, most importantly, create a hazard for slips and falls. If you have carpeted floors or rugs, consider vacuuming them daily, if possible. Before cleaning, sprinkle baking soda on the carpet to alleviate unwanted smells. The baking soda acts as a neutralizer, which helps to eliminate unpleasant scents. For non-carpeted flooring, sweeping and mopping are great for removing dust, dirt, and grime, which can create a dull cast on floors. A small amount of dish detergent mixed with warm water, vinegar, and baking soda is a good floor cleaner. It also helps to renew its shine. This same solution can also be used to clean other surfaces. Declutter and Organize Your Space A clean and uncluttered space makes an excellent environment for productivity. It improves concentration and ensures that there are fewer distractions. Instead, it enables you to find what you need without searching frantically for essential items. A clean desk or work area also reduces the risk of having sensitive paperwork misplaced. As a result, things remain where they need to be and can be attained when required. There are some simple habits you can implement to help keep your workspace organized. These include some of the following: Filing essential papers right away to avoid clutter Using trays and organizers for loose papers Using pen/pencil holders Unravelling phone cords Hiding power strips and plugs Minimizing personal items on a desk Utilizing a monitor stand and keyboard holders Adopting these suggestions for your workspace can not only affect the impression it makes on clients, but also influence how effectively you work. A clean and organized environment offers clarity and is beneficial for increased productivity. Sunrise-Cleaning for Professional Cleaning Services If you are looking for a company capable of offering exceptional cleaning services to your office, we encourage you to consider Sunrise-Cleaning. Our company is flexible in providing routine or occasional cleaning service s as required. However, should you require a more personalized cleaning service for your business, we can adhere to your individual needs. For more information on how we can help you maintain the cleanliness of your business, contact us at 905-567-1199 or here on our website.
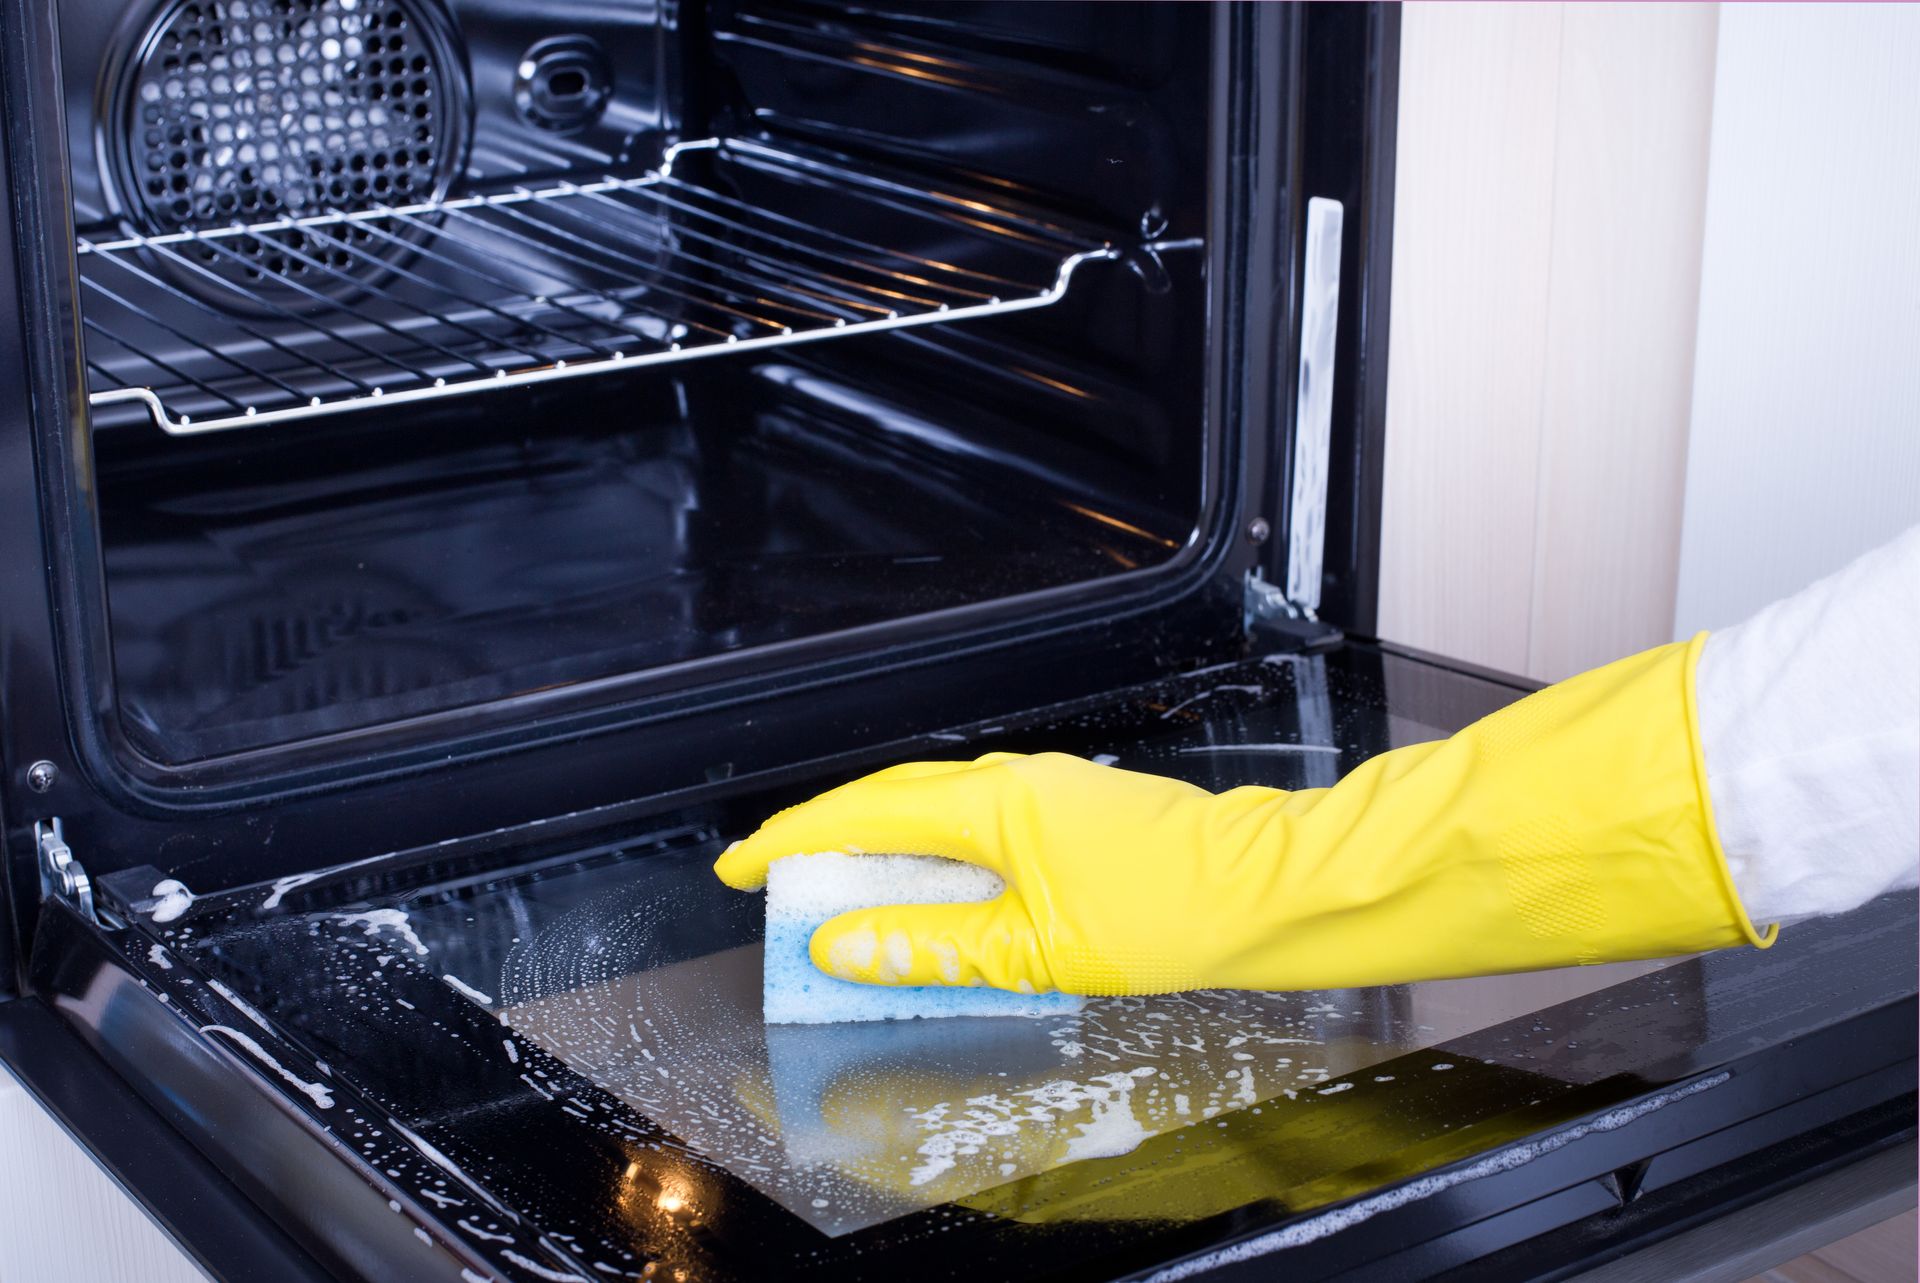
At the heart of any great home is a kitchen that hosts family and friends and is home to great food and even greater memories. Well, at the heart of that very kitchen is the oven. The oven is where all your favourite foods come alive right before your very eyes and sometimes where you wait patiently to make sure your cookies and cakes turned out alright. While your oven certainly does a lot for you and your family, it’s important to show it some extra care from time to time to keep working at its best. Cleaning your oven is essential to the cleanliness and well-being of those in your home. While it may not be the task you look forward to the most, but it needs to be done regularly. Read on to discover the different ways in which you can clean your oven and have it looking spotless every single time. DIY Oven Cleaning First, to get started cleaning your oven , you’ll need an old toothbrush, scourer, oven cleaner, sponges, and rubber gloves. To avoid damaging or dangerous chemicals in your cleaners, try to go with caustic-free products when cleaning your kitchen and your oven. Before you begin, make sure your oven is off and cool. Cover all gas burner jets and wear your rubber gloves; then, start to remove any food, crumbs, and leftovers that you see inside the oven. Next, remove all the shelving in your oven and soak them in water with soap. You can leave them to soak overnight if you have time. While the shelves are soaking, use your oven cleaner and sponge to spray and clean the oven’s corners. Leave the solution for a few minutes to soften tough stains and grease. Use your scourer on the oven racks to ensure they are nice and clean before rinsing and drying them. Ensure that you get into the corners of the oven where most people miss spots and leftover stains. You can use an old toothbrush to scrub hard-to-reach areas if necessary. Remember not to get anything that is electrical wet! You can also use this time to clean your baking trays by soaking and scrubbing them in a sink of hot water and liquid soap. The last step will be cleaning the glass door of your oven. Again, you can use a scourer for food and grease that is difficult to remove. Wipe down thoroughly and ensure that you don’t leave any cleaning product residue behind. Using the Self-Cleaning Function While cleaning your oven with your hands and getting into corners will give a thorough clean, some people opt to use their oven’s self-cleaning feature for convenience and ease. This method uses the oven’s high heat to incinerate leftover food particles and grease. Keep in mind that although your oven may be labelled as self-cleaning, we generally recommend removing and wiping down as much grease and food as possible before starting the self-cleaning option. You will also need to wipe down any ashes left over after the cleaning. While this is a great option and convenient for many, some people worry about the fumes that it may generate and any damage that can potentially occur with such high heat. Generally, you don’t want to leave your house while your self-cleaning oven is on. It’s also important to keep an eye on it and be mindful of small children and pets around while the oven is heating up. Using Alternative Natural Cleaners Unlike chemical cleaners (which use lye and caustic ingredients), homemade or alternative cleaners are much safer to use in your oven and around your kitchen and home. It would be best if you stayed away from using chemical off-the-shelf cleaners as much as possible because they let off fumes that are dangerous and hazardous to our lungs and health. Instead, use natural cleaning products that work just as well, such as baking soda, lemon juice, vinegar, and natural soaps. Keeping it Clean To make cleaning your oven much easier, try to clean up a little after every use and be mindful of letting messes linger for too long. You can use baking soda overnight on tough stains when they appear. Wipe down your oven’s glass screen after you do a lot of cooking and line your bottom oven shelf with foil beforehand to catch any food that falls. Also, consider using cooking bags to roast meat so that less fat and grease accumulate daily in your oven. While it may be easy to neglect cleaning your oven, hopefully, this serves as a reminder to take a peek inside yours if you haven’t done so in a while. Regardless of which cleaner you use, remember to keep your windows open while cleaning so that the area is properly ventilated. If you use the self-cleaning function, make sure there are no pets around. If you are unsure of which method to use or would rather let someone else do the task, consider getting your oven professionally cleaned. Not only does it save you time, but it also ensures a thorough cleaning safely and efficiently. For more cleaning tips and information on the house and office cleaning, please contact Sunrise-Cleaning at 905-567-1199 or contact us here .
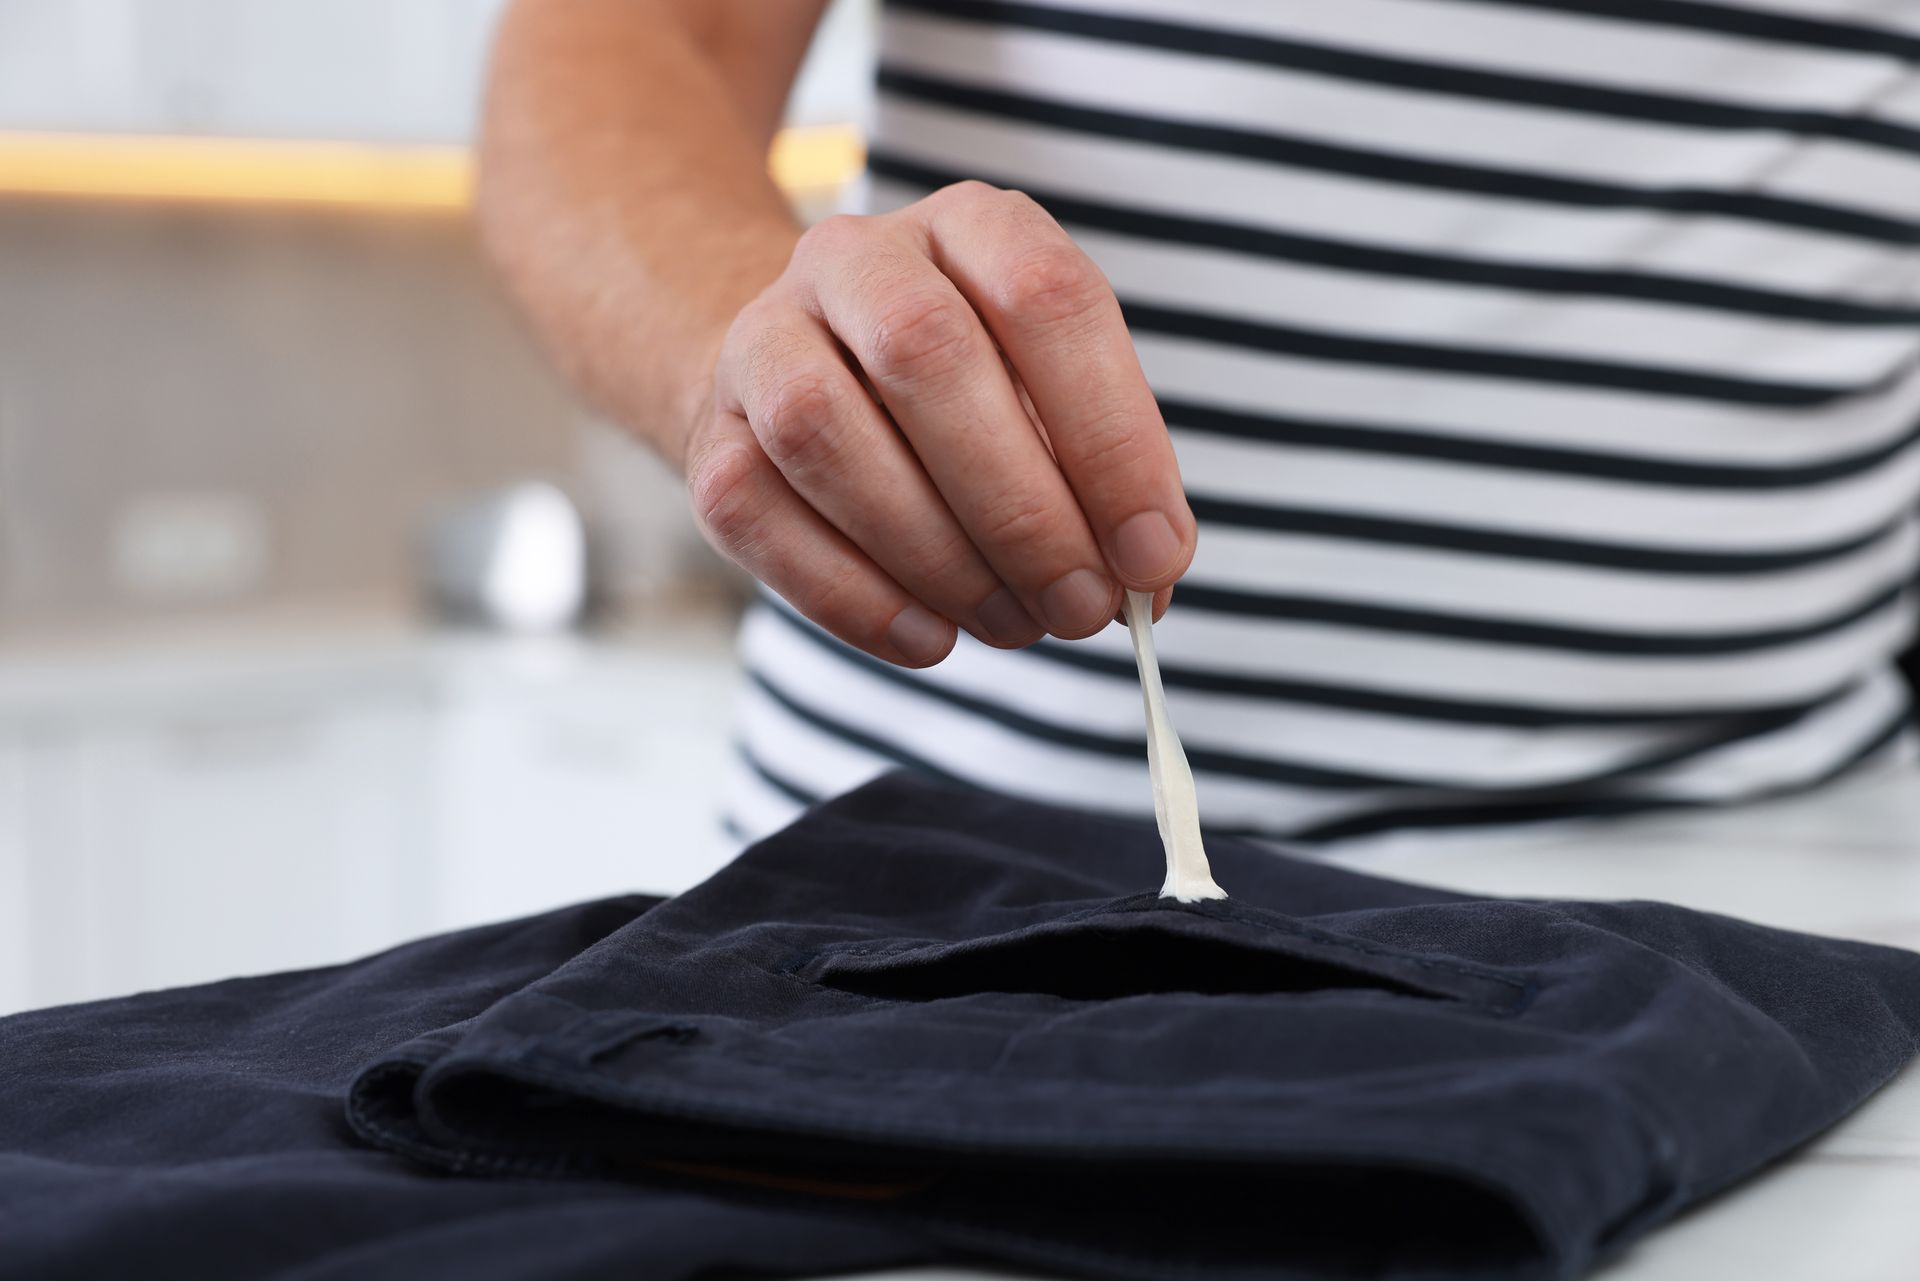
We all know that chewing gum is a quick, tasty treat beloved to both children and adults alike. However, what happens when chewing gum ends up where we least want it: not in our mouths, but on our clothes? Being as sticky as it is, chewing gum easily adheres to fabrics and materials, and can be a nuisance when it comes to laundering your clothes. Sometimes, gum can end up on your clothes without you even noticing. For example, strangers can leave their chewing gum on desk surfaces, chairs, and other places that you might encounter. At Sunrise-Cleaning, we’ve come up with a handy guide of clothing hacks you can use when that sweet bubblegum ends up where it shouldn’t. So, if you or your children do somehow end up with gum sticking to your clothes, read below and don’t fret. If anything, you should be thankful that at least it didn’t end up in your hair! Freeze it Off or Heat it Up To harden the gum and easily remove it from your clothing, try rubbing the affected area with an ice cube. Once it’s hardened, remove it swiftly with a butter knife or scraper. You can also pop the clothing in your freezer in a plastic bag for a couple of hours until the gum hardens. Just make sure that the gum doesn’t touch or smear on the plastic bag, and also be careful that you don’t put the clothing into the freezer with the gum faced down. Heat and hot liquids can also be applied to remove gum from your clothing. You can use a hairdryer to warm the gum and loosen it before peeling off. Alternatively, you can use hot water or steam to loosen the gum. Keep in mind that if you do submerge the clothing in hot water, you may need to repeat the process until the gum is completely removed. When the gum starts heating up and melting, it could get messy, so work carefully and use an old toothbrush to scrape the gum off as you go. Use an Iron To ensure that the gum on your clothing doesn’t get stuck on your ironing board, put a piece of cardboard in between the two before you start. Use light to medium heat when ironing, as you don’t want to run the risk of melting the gum and creating an even stickier mess. The goal of the ironing is to get the gum to stick to the cardboard instead of your fabric. It should do so eventually, so continue pressing on until you notice the gum has softened and stuck to your cardboard. Then, simply remove your clothing from the ironing board to reveal that the offending gum is left behind and truly defeated. Now, that wasn’t so difficult, was it? Peanut Butter to Remove Gum Because of the natural oils in peanut butter, it is a helpful product when it comes to removing gum off of your clothing. You will want to coat the gum entirely in peanut butter and make sure that the coating is thick. To avoid staining your clothing, leave the peanut butter on the gum stain for about one minute and then proceed to scrape the gum off with a sharp edge, such as a butter knife. Before putting the clothes to wash, use a stain remover on the spot, as peanut butter can tarnish your clothes. Now you know, peanut butter is not only delicious but great for removing gum! Coconut Oil to the Rescue In recent times, coconut oil has been used for a variety of ailments and as a treatment for our hair and skin. It’s a great moisturizer and can do wonders for our health. But did you know that coconut oil can also help to remove unwanted gum from clothing? You’ll want to heat the coconut oil for a few seconds and then dip the affected area into the oil and work it in so that the oil saturates the stain and dissolves the gum. Once complete, remove the oil to avoid staining and wash the clothing afterward. Not only can coconut oil remove gum from clothing, but it’s a good method of removing gum from your hair as well. Gently Scrape and Wash Sometimes, you might get lucky. If the gum is fresh and hasn’t had the chance to really get into the fabric, it may be an easy fix. You may be able to gently scrape it off (don’t force it) and then put it in the wash to remove any small remaining tidbits. It may be helpful to use a pair of tweezers to remove the gum without spreading it. This also really depends on how much chewing gum got onto your clothes in the first place, as a small amount will be easier to deal with. Regardless of which technique you do use to remove the gum, you will want to throw your clothes in the wash afterwards to remove any residue. Armed with these clothing hacks, you’ll be sure to get rid of unwanted chewing gum both easily and thoroughly. All of the hacks above are quick, simple and will take less than ten minutes of your time. At Sunrise-Cleaning, we value your time and understand that cleaning on a busy schedule can be difficult. For your convenience, we offer to do the cleaning for you! For more information on cleaning hacks or our cleaning services , please call Sunrise-Cleaning at 905-567-1199 or contact us here .
Enjoy Your Life and Leave the Cleaning to Us!
Address
2812 Tradewind Drive
Mississauga ON, Canada
L5N 6L1
Opening Hours
Monday - Friday | 7:00 AM - 7:00 PM
Saturday | 7:00 AM - 2:00 PM
Sunday | Closed
